
Podcast: Download (Duration: 31:03 — 29.3MB)
Show Notes: Episode 156
Today on the First 40 Miles, follow us on a whim to the land of crispy crust and creamy mozzarella, where the sauce is rich and spicy and the toppings are bountiful and varied. We’re going to make pizza! This episode is for everyone from the kitchen challenged to the culinary adventurers. So set aside your freeze dried sweet and sour textured vegetable protein, and let’s make pizza!
Opening
- Making pizza at the park
- Used the MSR WhisperLite and BEMCO Backpacker Oven
Top 5 Ways to Enjoy Pizza on the Trail
Pick it up on the way (hot and ready…)
- Josh picks it up on the way sometimes
- Great for overnight, spontaneous trips
Cold pre-packed pizza
- Pizza freezes well, so next time you have pizza, save a few slices in the freezer for your next overnight trip.
- You can wither eat it cold or heat it over a flame or a small pan
- We often make something called pizza rolls. Just take your favorite cinnamon roll recipe, and instead of putting cinn/sugar inside, put pizza sauce and cheese inside and roll up and slice—just like you would with cinnamon rolls.
Pizza snacks
- Crackers with pepperoni, pepper jack cheese, maybe a squeeze tube of tomato paste
- Give you the flavors of pizza, but will never be as dreamy as a hot slice with cheese dripping off and burning your hand.
Pre-made Pizza Components
- In Trail Fuel, we have a pizza recipe…
- Instead of mixing dough, letting it rise, rolling it out…just use a tortilla or a pita.
From Scratch–In an oven
- Takes some planning, some extra gear and some tinkering
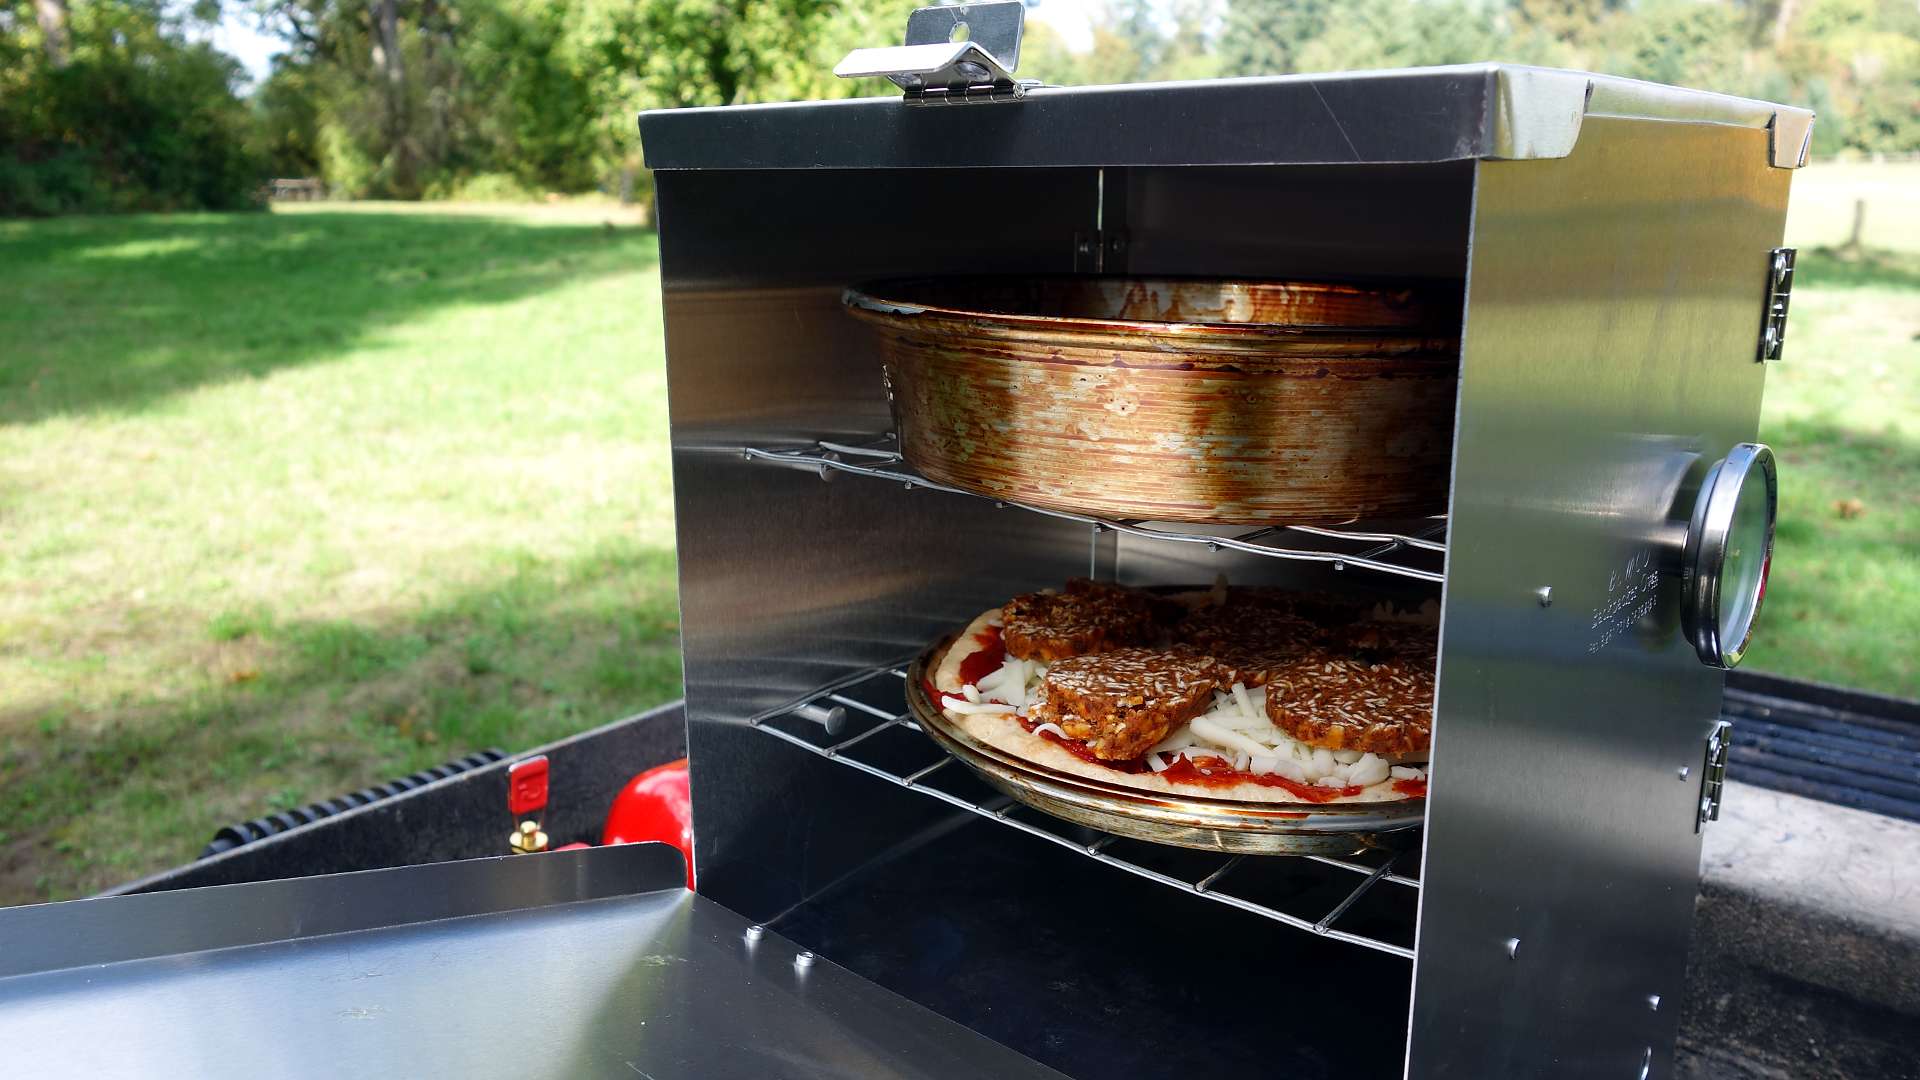
- We had a great time making pizza using the Bemco Backpacker Oven
- Ultimately, the benefit that comes from baking from scratch is that you have 100% control over the ingredients.
- We made our pizza with a whole wheat crust, pizza sauce (that we made without using sugar), real whole fat mozzarella, and some vegan pepperoni we made.
- You can bring any toppings you want… fresh mushrooms, zucchini, red pepper, olives…
SUMMIT Gear Review™: Bemco Backpacker Oven
Structure
- We’re reviewing the 7″ Backpacker Oven
- Made of lightweight aluminum
- Door opens just like an oven door and has a little latch to keep it from falling open
- Two shelves
- Top can also be used to keep food warm while other food is baking
- Vent hole in top
Utility
- Comes with a screw in thermometer—which you will need
- Came with two pans
- One was a 6” deep dish pan (for cakes, pizzas, etc.)
- The other was a shallow round 6” pan for pizza
- Also came with straps, and a user guide that had some recipes
- You can order a gripper separately and a stuff sack…
Mass
- Weighs 24 ounces
- With pans included 31.85 ounces
- Measures 7.5” x 7.5” x 12″
Maintenance
- Putting away…
- No mess on oven, but if something dribbled over, take a minute after the oven has cooled to clean it off before it goes into your pack.
- Also, the oven comes with straps to keep it together in your pack, but you will most likely want a stuff sack.
Investment
- $40 for the 7” oven without pans
- $50 for the 7″ oven with pans
Trial
- Oven has two shelves, and both can be used at the same time—but you’ll probably want to switch the two pizzas so they can brown evenly.
- The bottom pizza got more crispy and browned than the top one, so we switched after about 10 minutes.
- Heats up in 2 minutes to temp–It heats up so fast, so you’re not wasting fuel on preheating
- To save on weight, this oven is not insulated—which means the whole thing gets NASA hot while it’s baking. Use your bandana/pot grabber/silicone grabber to stabilize the oven when you’re opening and closing the oven door. It’s hot!
- Kind of tricky to regulate temp because of stove not responding immediately
- Right way to put it away, but you don’t have to do it right—just slide it into a stuff sack.
- You can bake anything in this oven that you can bake in a home oven. Lasagna, tubed cinnamon rolls, biscuits, birthday cake, quickbreads,
Backpack Hack of the Week™: Gluten-free Vegan Pepperoni
This recipe is included in Heather’s upcoming book, Trail Grazing.
1 cup oats (any kind)
1/4 cup ground flax seed
1/4 cup nutritional yeast
1/4 cup tomato paste
1/4 cup water
2 tsp salt
2 tsp liquid smoke
1 tsp ground black pepper
1 tsp garlic powder
Mix all ingredients in a medium bowl and stir until combined. Divide dough in half and place each half on a piece of parchment paper or aluminum foil. Using the parchment paper or wet fingers, shape the dough into a log approximately 6-8 inches long.
Once the dough is shaped, wrap the parchment paper around dough then twist the ends of the parchment paper tightly and fold them under.
At this point there are two different ways you can cook this pepperoni.
Stovetop: In a double boiler, steam the wrapped pepperoni for 45 minutes. Remove pepperoni and unwrap slightly to allow steam to escape. Cool before slicing.
OR
Pressure cooker: Place 1 cup of water in the pressure cooker. Place the steamer tray inside and set the wrapped pepperoni on the tray. Cook on high pressure for 15 minutes. You can quick release or natural release. Remove pepperoni and unwrap slightly to allow steam to escape. Cool before slicing.
NOTE: For added heat, add 1 tsp of red pepper flakes.
Trail Wisdom
“Long walks with a pack on one’s back are necessary in time of war, but I do not see why a man should go on marching in times of peace.”
–Robert Lynd, The Blue Lion, 1923